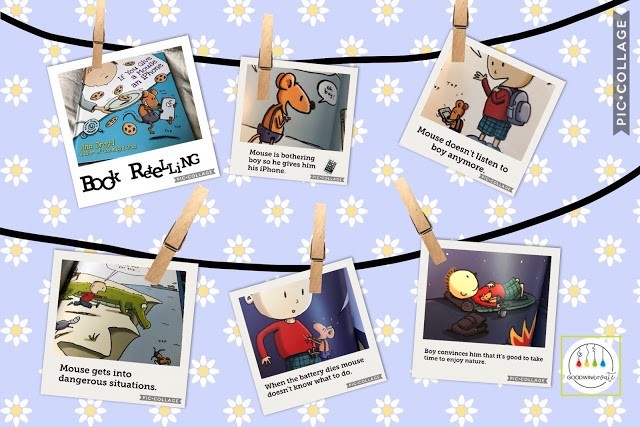
Story retelling is an important skill students need to practice and perfect. Why not use the Pic Collage app to help with this? This is a simple project with lots of variety and choices to make your own creation.
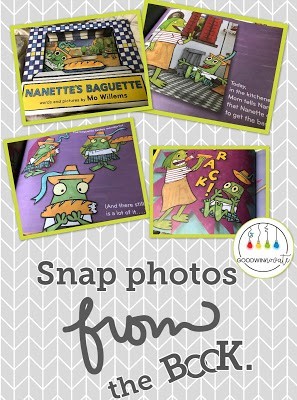
To start your project you need to find the book you would like to do a Polaroid Retelling about. Then snap a photo of the cover of your book for one of your photos. Next snap some pictures of the beginning, middle, and end of the story. It is best to hold your phone in the horizontal position so that the pictures fit better in the frame. Snap as many photos as you want to be in your project.
STEP 1.
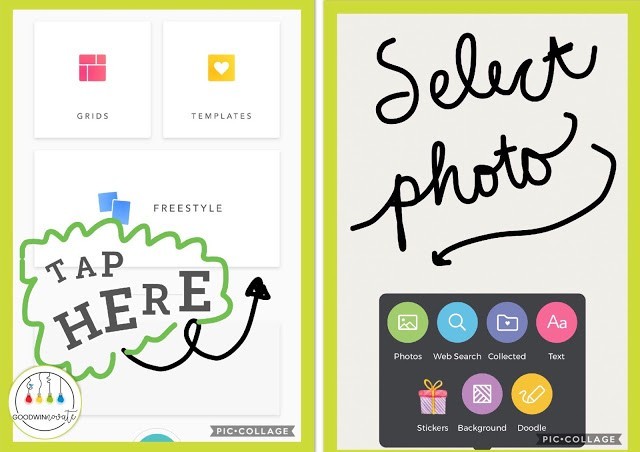
Start with one photo, tap freestyle, and then tap photo and add the photo.
STEP 2.
STEP 3.
STEP 4.
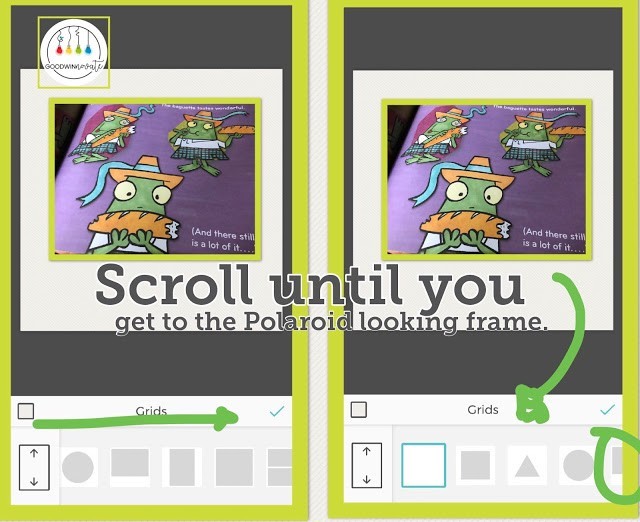
Once you tap the correct frame slide the dot completely to the right so it makes a nice frame around your photo the save to your camera roll. Do this will all your photos for the project retelling. If you want to type any text on your photo do it now before you load it to your camera roll. See samples for ideas. After you have all photos saved to your camera roll you are ready for the next step.
STEP 5.
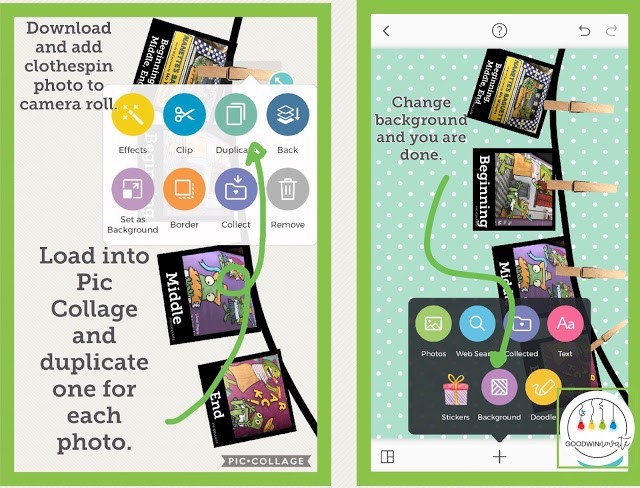
Next you need to load all your photos onto a Pic Collage Background and add a shadow to each photo.
STEP 6.
Draw a line for the photos to hang from with the doodle tool. Last add your clothespin file and duplicate it to get enough for each photo. I made a free PNG clothespin file that you may use with your classroom for this project. Go to this CLOTHESPIN file and download the clothespin to your camera roll. This will be the last thing you want to add to your project and make sure it is on top of your photo so it looks like it is hanging your photos on the line. Be creative and change the back ground to the color you want.

Now you have a nice Photo Story Retelling project. I hope you have fun with this photo retelling project.
Be sure to check out more ideas I share my Facebook, Instagram, and Twitter


